This is the second tutorial in a series about learning Gfx-hal - a low-level graphics API in Rust. If you haven’t already, I’d recommend starting with Part 0 to learn the basics. Why did I decide starting a tutorial at Part 0 was a good idea? Who knows, but it wasn’t.
This tutorial builds on the code we wrote in the previous part. You can find the new code here with comments explaining everything that’s changed, and run it to see what the end result will look like. Last time we got a single triangle rendering on screen. This time we’re going to look at what we need to do to allow window resizing to work properly.
If you take our lovely triangle from the last part and try to resize the window, you may notice an issue.
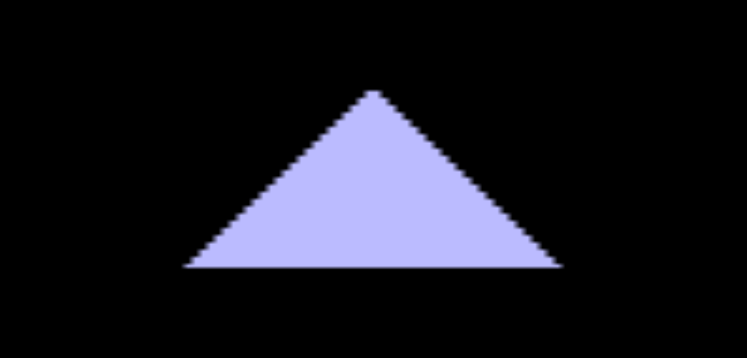
It should be fairly obvious what’s going on here. Even though our window is getting bigger, the image we’re rendering is staying the same size. Some less-than-spectacular interpolation is giving us a blurry, jaggy image as a result.
The solution to this is fairly simple, although it does require us to change the structure of our code a little. What we’re going to do is detect when the window has resized, and recreate every resource that is sensitive to the screen resolution.
But first…
Like I said in the previous part, gfx-hal isn’t quite stable yet. As a result, sometimes the latest version will fix one of your bugs, and simulataneously break your code. Every so often throughout these tutorials I’ll be switching to a newer version of the API. Each time I do, I’ll show the versions I’m using like this:
[dependencies]
winit = "=0.17.2"

[dependencies.gfx-hal]
git = "https://github.com/gfx-rs/gfx"
rev = "16feb392"

[dependencies.gfx-backend-metal]
git = "https://github.com/gfx-rs/gfx"
rev = "16feb392"
I’ll also update the code of the earlier parts so that they still compile, so even if the text of an older tutorial is out of date, the code in Github should not be. When gfx-hal stabilizes, I might redraft them all to bring them up to speed.
Anyway, without further ado, here’s how we can properly resize our window.
In our current code, there are only four things that need updated should our window resize:
This should make some intuitive sense - if we change the window size, then the images we put on screen need resized. If we resize those images, then we need to resize the image views and framebuffers for them. In future, we might have more to do, but it’s just these four for now.
This means we need to do something like the following:
// This is pseudocode!
let (mut swapchain, mut extent, mut image_views, mut framebuffers) = make_swapchain_stuff();
loop {
    if resizing {
        destroy_swapchain_stuff(swapchain, image_views, framebuffers);
        (swapchain, extent, image_views, framebuffers) = make_swapchain_stuff();
    }

    draw_things(...);
}
destroy_swapchain_stuff(swapchain, image_views, framebuffers);
However, there’s something a little inelegant about that to me. We’re creating and destroying these resources in two places each. Which means whenever we change that code, we have to change it in twice as many places.
My solution to this is to defer creation until the mainloop starts, and destroy it before the mainloop exits. Which will look something like this:
// This is also pseudocode!
let mut swapchain_stuff: Option<Stuff> = None;
loop {
    if resizing || quitting {
        destroy_swapchain_stuff(swapchain_stuff.take());
    }

    if quitting { break }

    if swapchain_stuff.is_none() {
        swapchain_stuff = Some(make_swapchain_stuff());
    }

    draw_things(...);
}
So now we always create and destroy our swapchain in the same place. We destroy it if we need to at the start of the loop. If we quit the mainloop, we never recreate it and it stays destroyed. If we don’t then we recreate it before we have to render anything.
That’s roughly how the code is structured in this tutorial, but let’s get into some more specifics.
Outside our mainloop, we declare all the stuff we might want to recreate at run-time:
let mut swapchain_stuff: Option<(_, _, _, _)> = None;
Note that we’re using a 4-tuple to store the swapchain, extent, image views, and framebuffers respectively.
We’re also making the compiler infer the types for these four things. We could have instead defined a struct containing all four of them, but then for one thing, we would have to know and write the exact types of them, and for another, we would have an additional struct to update every time we expand on this.
Now, inside our mainloop, we first have to deal with the destruction of the swapchain:
    if (resizing || quitting) && swapchain_stuff.is_some() {
        let (swapchain, _extent, frame_views, framebuffers) =
            swapchain_stuff.take().unwrap();
            // The value of swapchain_stuff is now `None`.

        device.wait_idle().unwrap();
        command_pool.reset();

        for framebuffer in framebuffers {
            device.destroy_framebuffer(framebuffer);
        }

        for image_view in frame_views {
            device.destroy_image_view(image_view);
        }

        device.destroy_swapchain(swapchain);
    }
Before we pull the rug out from under our rendering, we wait for the device to be idle, at which point, all the command queues are empty. Then we can safely reset the command pool, which resets and command buffers.
Now we can be confident that nothing is using the old swapchain’s images and we can destroy it, along with the associated framebuffers and image views. Basically anything that was resolution-dependent.
Next up, before we continue and possibly recreate our swapchain, we should break from the mainloop if our app is supposed to quit:
    if quitting {
        break;
    }
If we make it past that point, we may be missing a swapchain and have to recreate it:
    if swapchain_stuff.is_none() {
        let (caps, _, _) = surface.compatibility(physical_device);
        let swap_config = SwapchainConfig::from_caps(&caps, surface_color_format);
        let extent = swap_config.extent.to_extent();

        let (swapchain, backbuffer) = device.create_swapchain(&mut surface, swap_config, None);

        let (frame_views, framebuffers) = match backbuffer {
            Backbuffer::Images(images) => {
                let color_range =
                    SubresourceRange { aspects: Aspects::COLOR, levels: 0..1, layers: 0..1 };

                let image_views = images.iter()
                    .map(|image| {
                        device.create_image_view(
                            image,
                            ViewKind::D2,
                            surface_color_format,
                            Swizzle::NO,
                            color_range.clone(),
                        ).unwrap()
                    }).collect::<Vec<_>>();

                let fbos = image_views.iter()
                    .map(|image_view| {
                        device.create_framebuffer(&render_pass, vec![image_view], extent).unwrap()
                    }).collect();

                (image_views, fbos)
            }
            Backbuffer::Framebuffer(fbo) => (Vec::new(), vec![fbo]),
        };

        // Store the new stuff.
        swapchain_stuff = Some((swapchain, extent, frame_views, framebuffers));
    }
This code is more or less identical to what we did in the previous part.1
The main difference is that we’re storing all of the resources inside the swapchain_stuff variable. This brings us to the final change that we have to make. Just before we start rendering, we’ll need to get direct access to the swapchain, extent, and framebuffers:
let (swapchain, extent, _frame_views, framebuffers) = swapchain_stuff.as_mut().unwrap();
All this does is give us a mutable reference to all the uh, stuff, in swapchain_stuff. We can safely unwrap here because we know that if the swapchain didn’t exist, we would have recreated it above.
And that’s that! The rest of the rendering code is exactly the same as before. You should now be able to resize your window and see this:
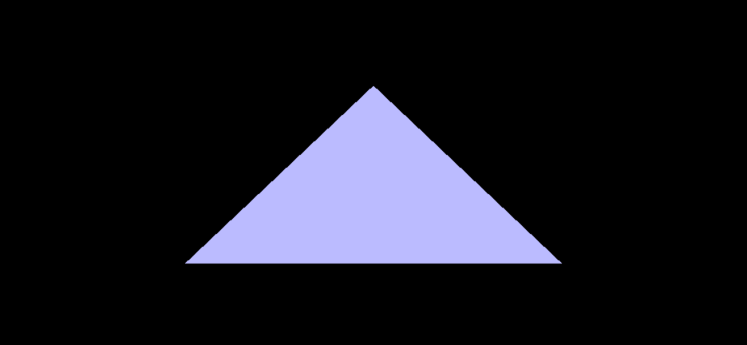
Not Bad.
This was a fairly small entry, but an important one for pretty much any window-based application. In the next part, we’ll stop using a vertex shader to define vertex positions and instead learn how to build and use vertex buffers. Thanks for reading, and look forward to Part 2 soon.
EDIT 2018-08-28: While the original version of this tutorial worked with the Metal backend on macOS, there were some panics in the Vulkan backend. You can fix these by checking for errors when acquiring the frame index and presenting the swapchain, and recreating the swapchain if those fail.
If you’ve come straight on the heels of Part 0, you might notice the API for creating a SwapchainConfig has changed slightly. The rest of the code should be the same however. ↩
